Code Repository vs Tests Repository
Checksum works with up to two repositories:- Tests repository — This is where your Playwright tests live. Checksum writes to this repository by opening pull requests with generated or healed tests. Every project must have a tests repository connected.
- Code repository (optional) — This is your application’s source code. Checksum reads this repository to understand your app’s routes, components, and interactions, which significantly improves test detection accuracy. Checksum never writes to the code repository.
Setting Up Your Test Repository
There are two ways to set up a test repository depending on your project structure.Option A: New Dedicated Test Repository (Recommended for Getting Started)
Create a new repository dedicated to your Checksum tests. This is the simplest way to get started and keeps your test suite cleanly separated from your application code.- Create a new repository on GitHub or GitLab
- Clone it locally
- Initialize the project and install dependencies:
Option B: Add to an Existing Repository
If you want your tests to live alongside your application code, we recommend creating a dedicatedchecksum/ directory with its own package.json. This keeps Checksum’s test dependencies separate from your production dependencies.
@checksum-ai/runtime and playwright, then run npx checksumai init to scaffold the project.
What Init Creates
Runningnpx checksumai init generates the following project structure:
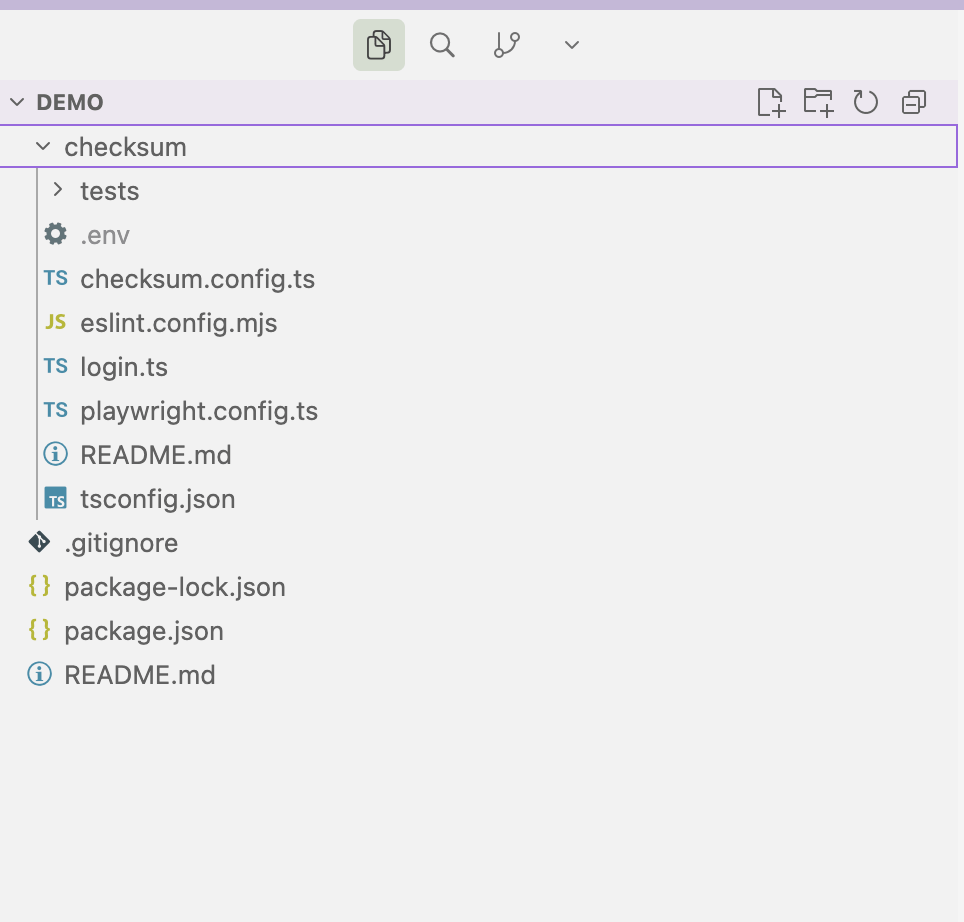
checksum.config.ts— Central configuration file for your Checksum project (see below for a full reference)playwright.config.ts— Standard Playwright configuration, pre-configured to work with Checksumlogin.ts— A helper module for authenticating test users during test runstests/example.checksum.spec.ts— A sample test that validates your setup is working correctly
Configuration (checksum.config.ts)
The checksum.config.ts file is the central configuration for your Checksum project. Below is a complete reference of all available fields.
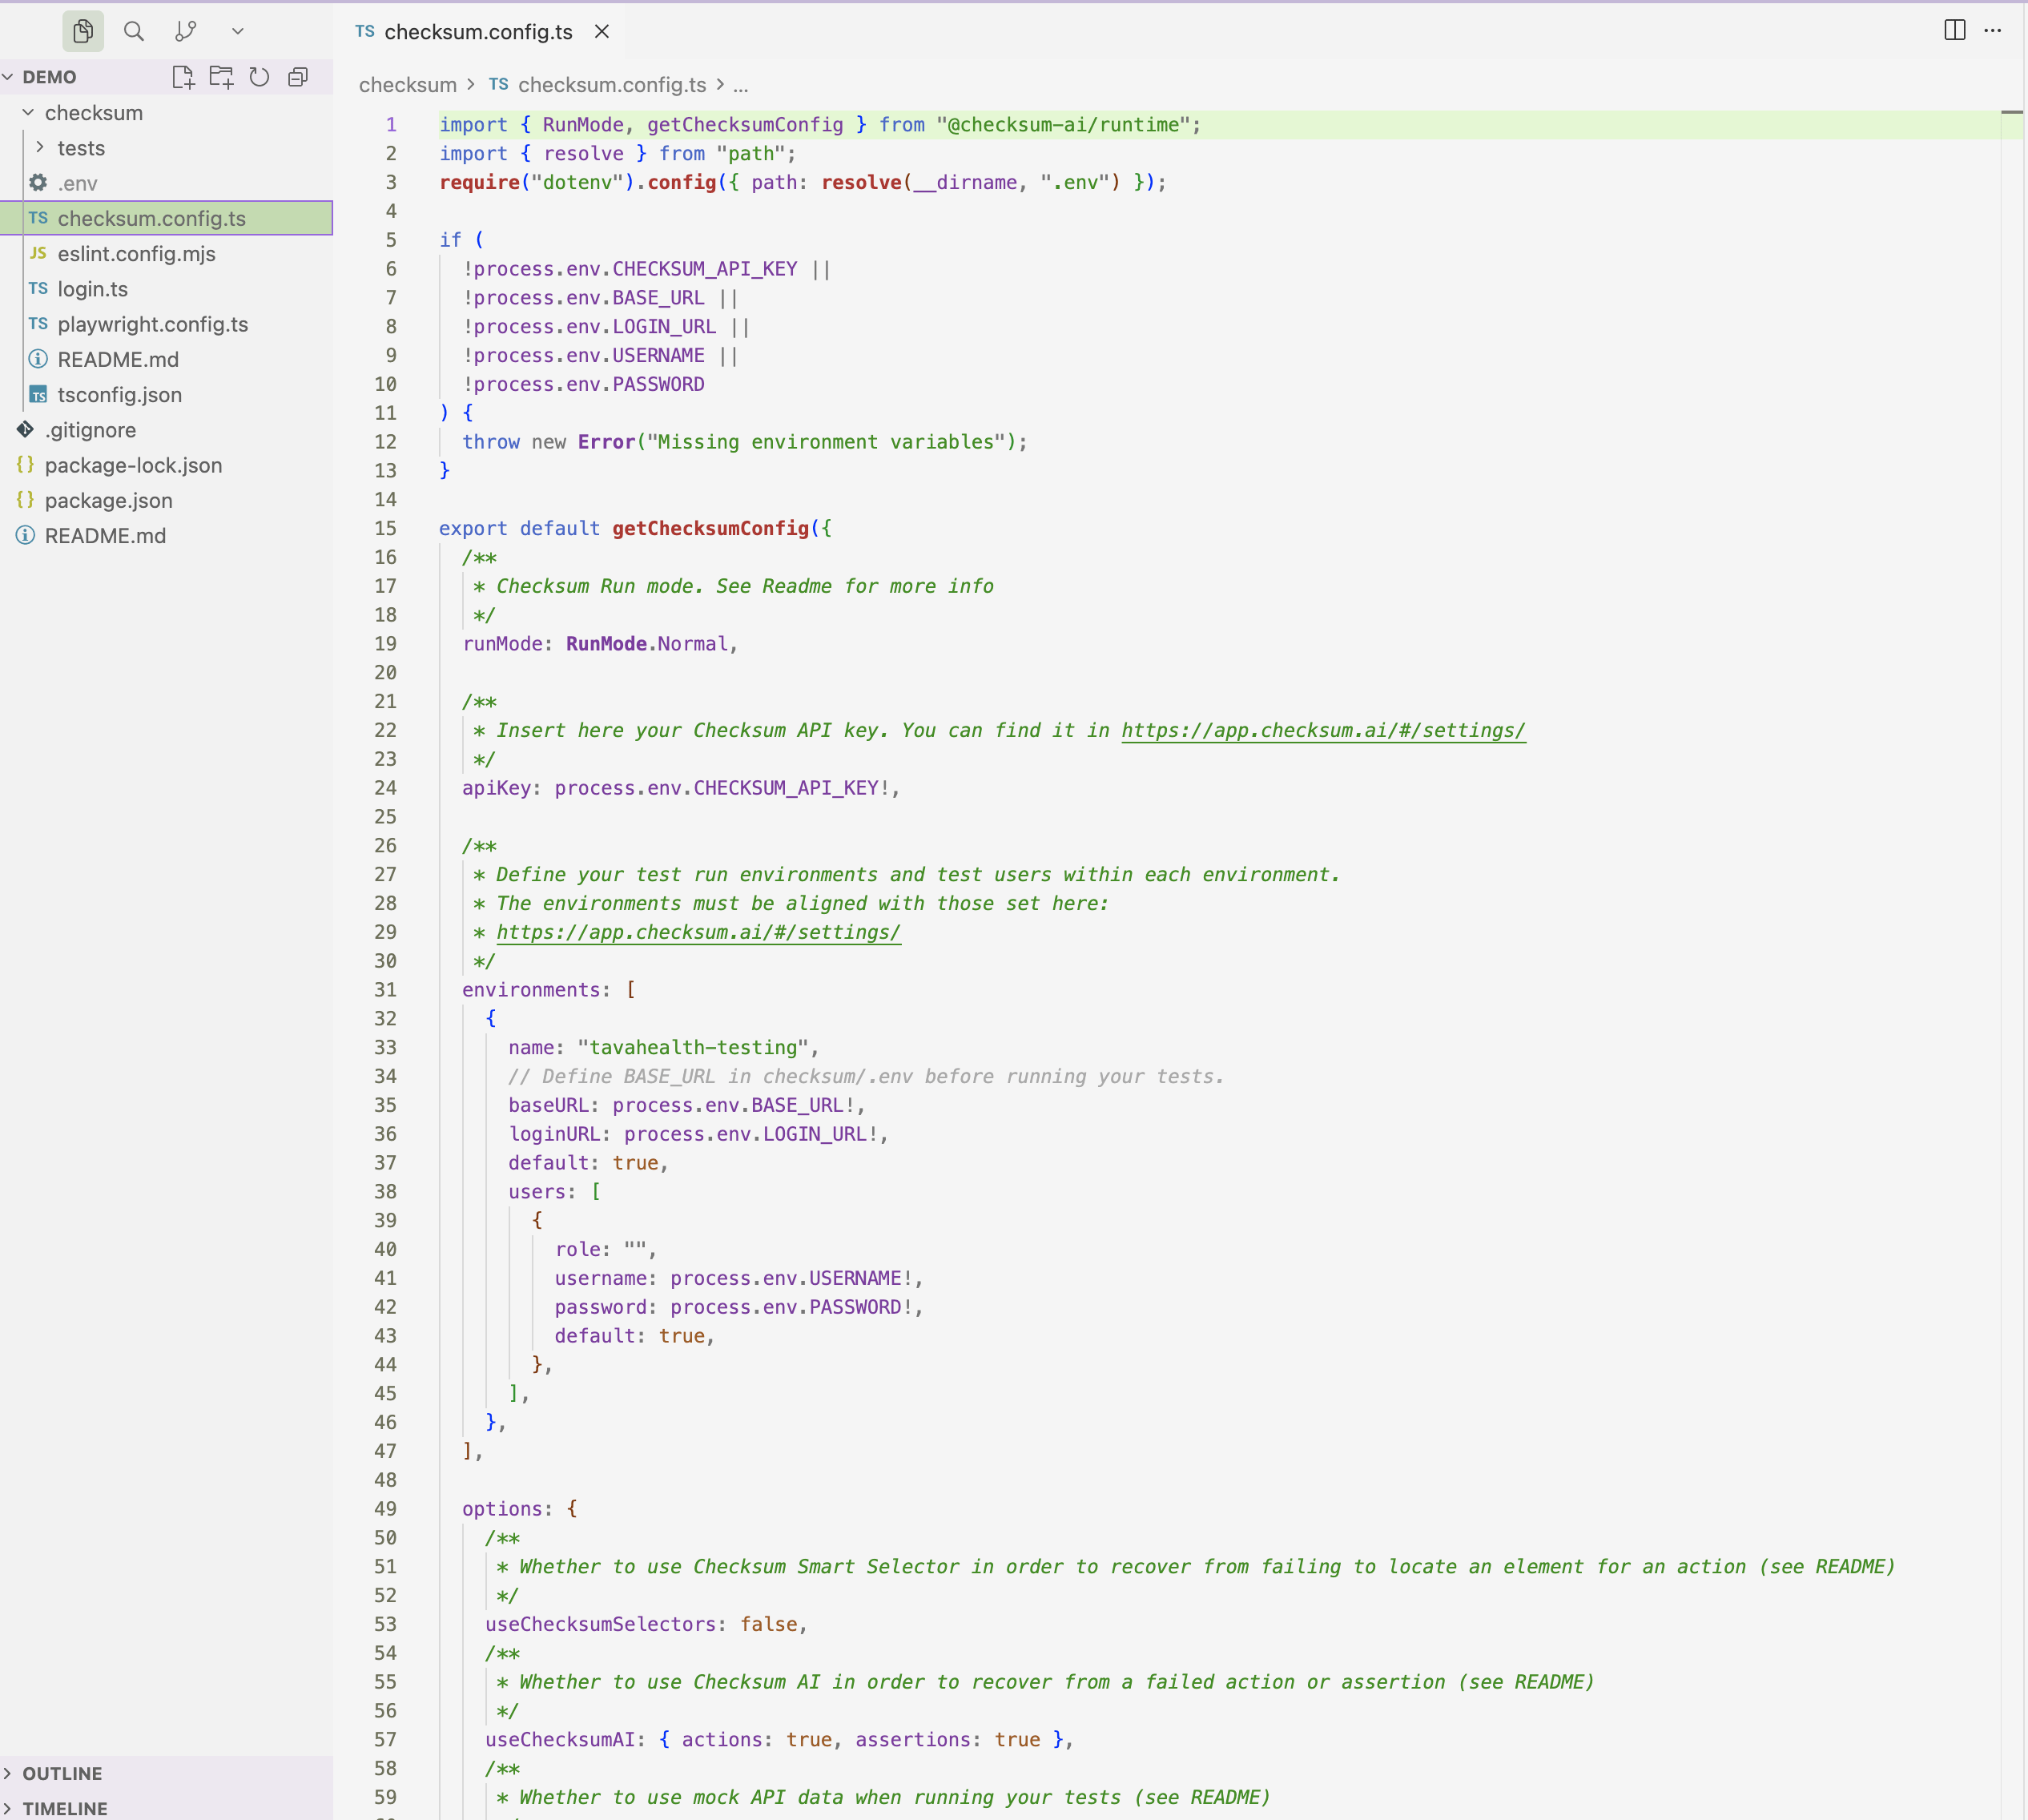
apiKey
Your Checksum API key. You can find this in Settings → Project Settings in the Checksum web app.
runMode
Controls how tests behave when they encounter failures.
environments
Environment settings configured here must match what you’ve set in the Checksum web app. See Environment Configuration for how to manage environments, credentials, and custom variables through the UI.
An array of environment configurations. Each environment describes a target application instance that tests can run against.
Each entry in the
users array has the following fields:
options
Fine-grained controls for test execution behavior.
|
useChecksumSelectors | boolean | true | Enable Smart Selector recovery. |
| useChecksumAI | object | { actions: true, assertions: false } | AI-powered recovery. actions: true lets the AI retry failed interactions. assertions: false means assertion failures are not auto-recovered. |
| useMockData | boolean | false | Use mock API data during test runs. |
| hostReports | boolean | true when CI=true | Upload test reports and traces to the Checksum dashboard. |
| autoHealPRs | boolean | true when CI=true | Automatically create PRs with healed tests in CI. |
Complete Example
Verifying Your Setup
After initializing your project, verify that everything is configured correctly by running the example test.- Install Playwright browsers:
- Download your environment variables from Checksum:
- Run the example test:
Next Steps
- Connect your Git provider to enable test delivery via pull requests
- Detect test flows from your application